Saturday, March 9, 2019

Quilts for Tornado Victims

Last Sunday, March 4, 2019, a EF-4 tornado surprised thousands of people just east of Auburn, Alabama. The tornado was 1/2 mile wide and traveled for over 70 miles before it dissipated.  23 people were killed, including 4 children, and over a hundred others were injured. Hundreds of people lost their homes and everything they own. 


You can look it up, and have maybe seen pictures already, but here are just a few:


Audrey Smith, @audreypawdrey on Instagram, and I are both graduates of Auburn University, and Audrey still has family there. After I checked in on everyone I know who is near, or has dear ones there, Audrey and I decided that we wanted to help, as quilters do.


We are requesting finished quilts and/or quilt blocks to send to the victims. I know there are other quilt drives for victims of this tornado, but we wanted to reach out to our community of quilters and friends and ask you to participate with us. 


Together, we can share some love and comfort and quilts with those who have lost everything. :o(


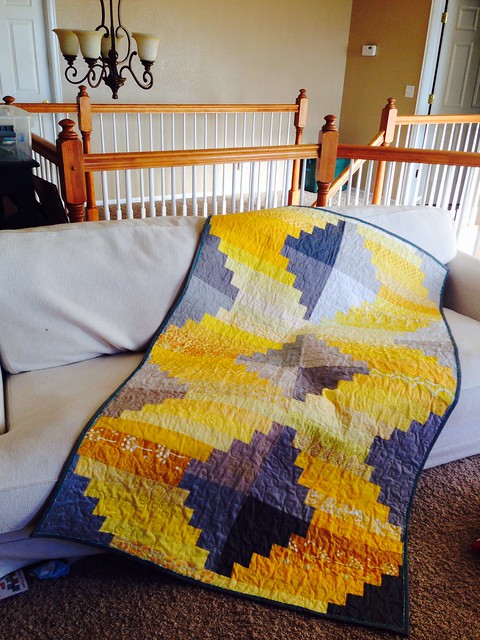
If you are interested in sending finished quilts (I know I've got a few I can send!), we are partnering with the Cotton Boll Quilt Guild in Auburn, and they are willing to receive finished quilts and distribute them when the victims are ready to receive them. Email me or send me a DM on instagram for their address. (my email is weshallew @ gmail (dot) com)


If you are interested in sending Audrey and me blocks, which we'll put together and make into quilts for them, email me or send me a DM on instagram, as above.  *due end of April, please.


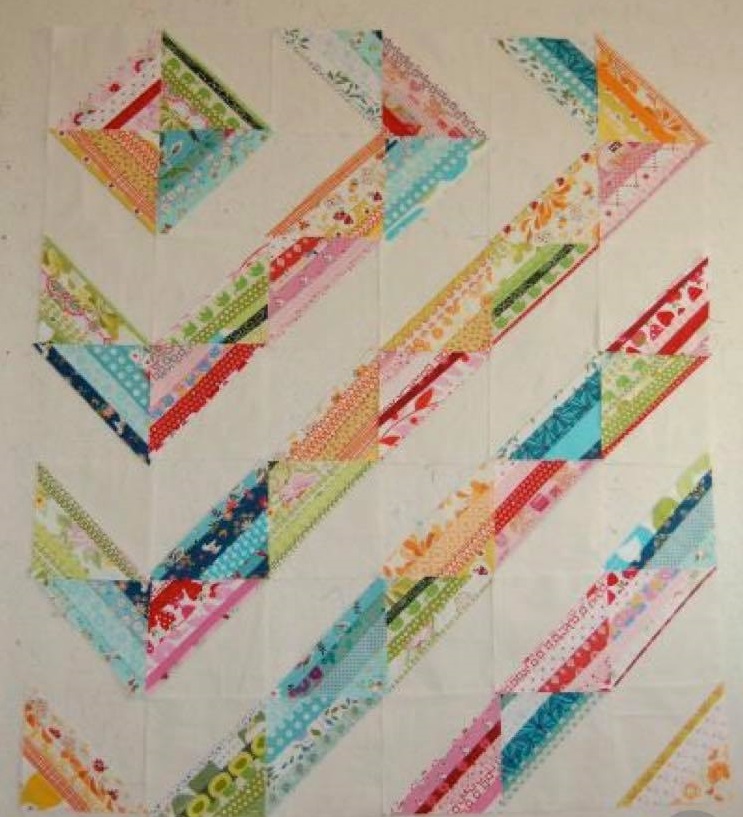
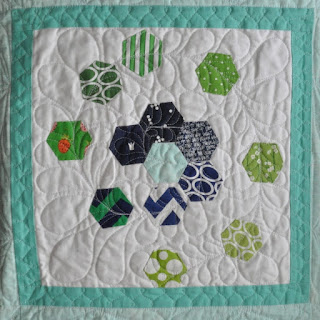
These are my EQ7 sketches of the quilts we could make. It doesn't include the various block sizes, but we can just use our imagination for that. ;)


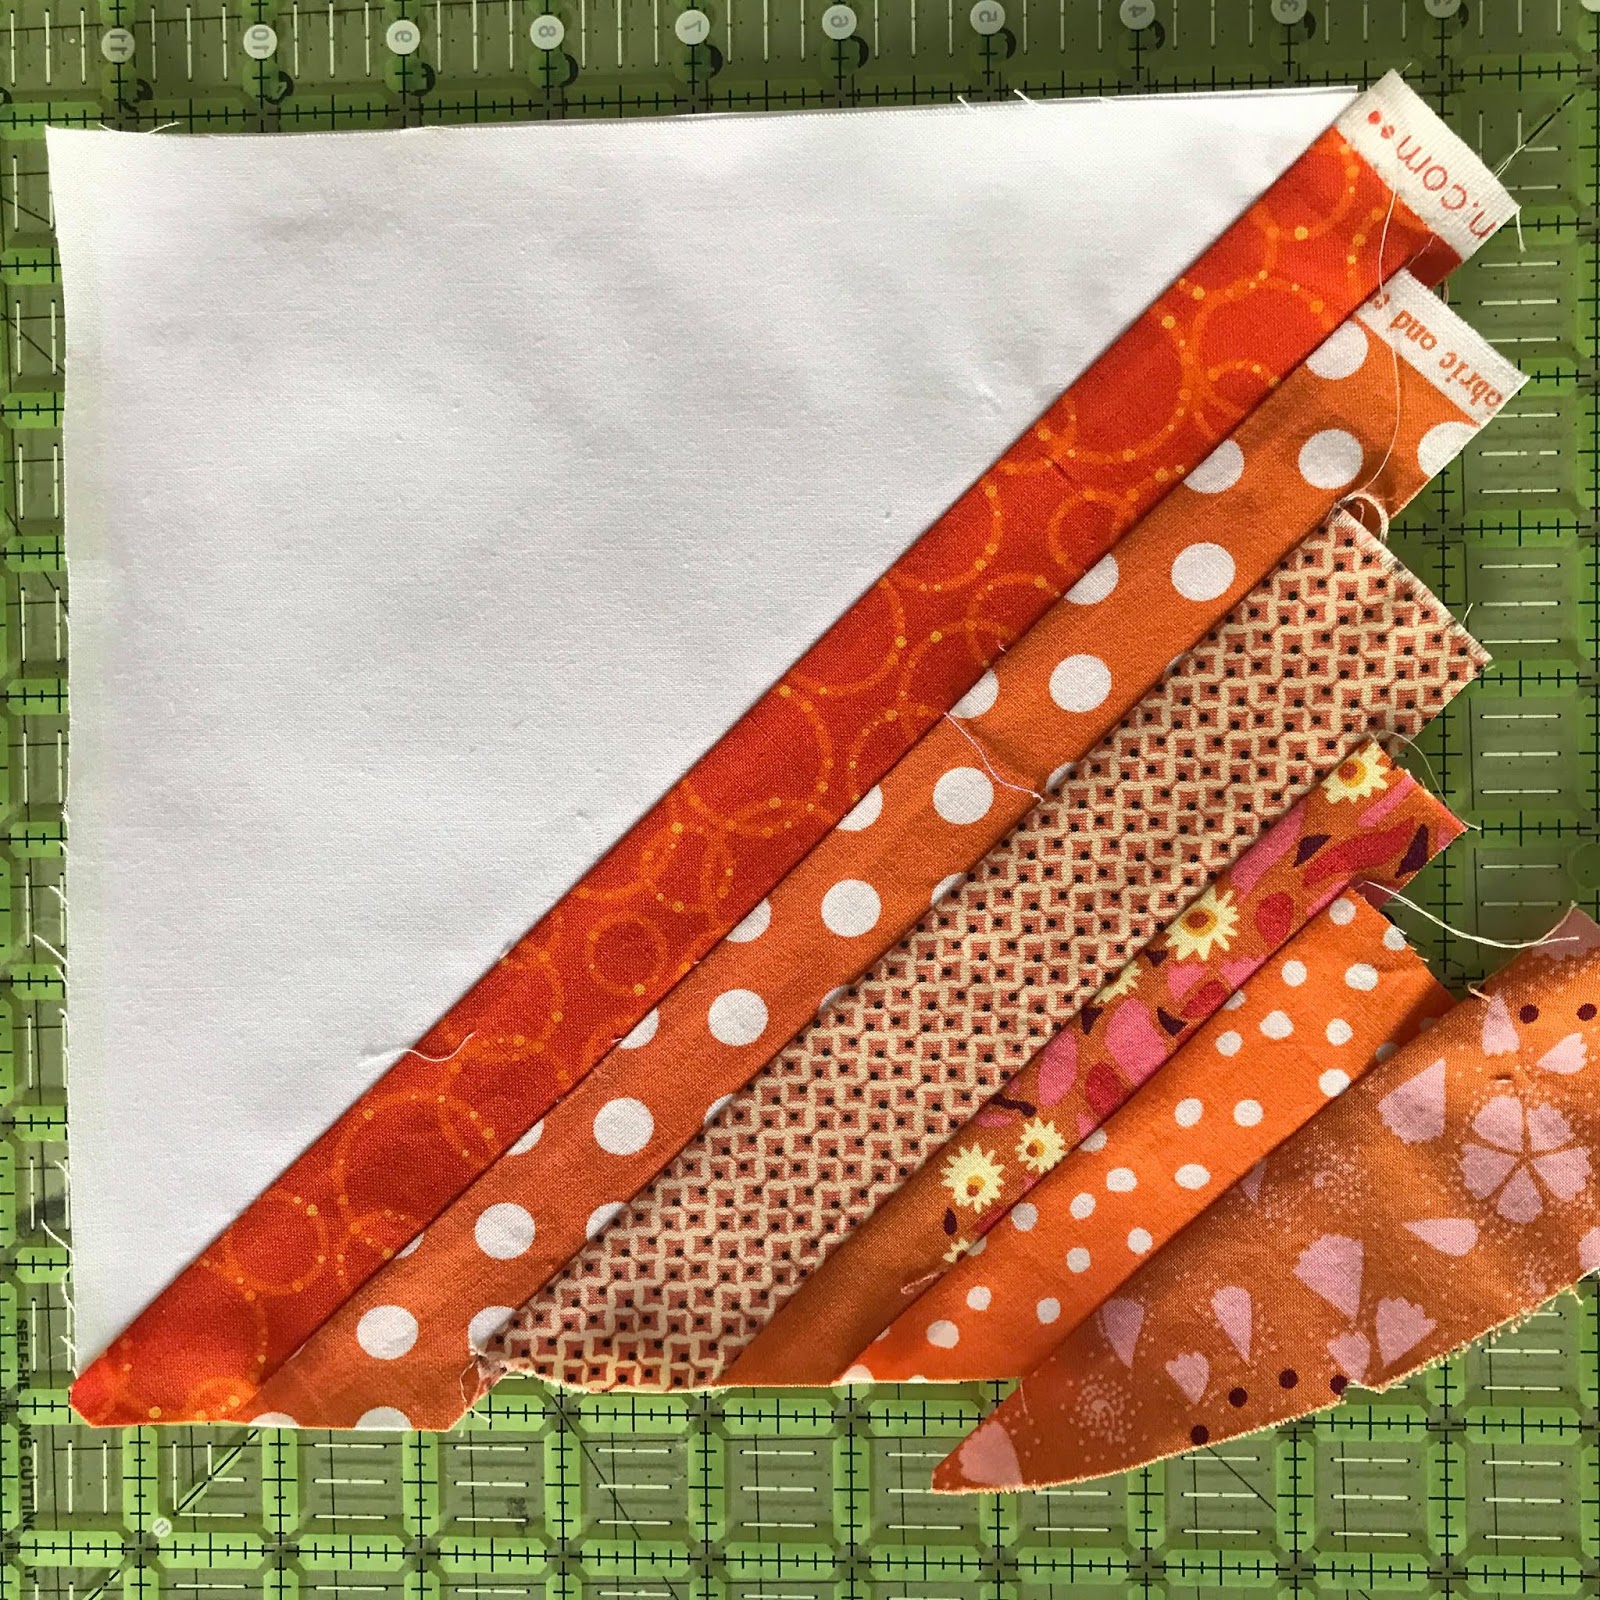
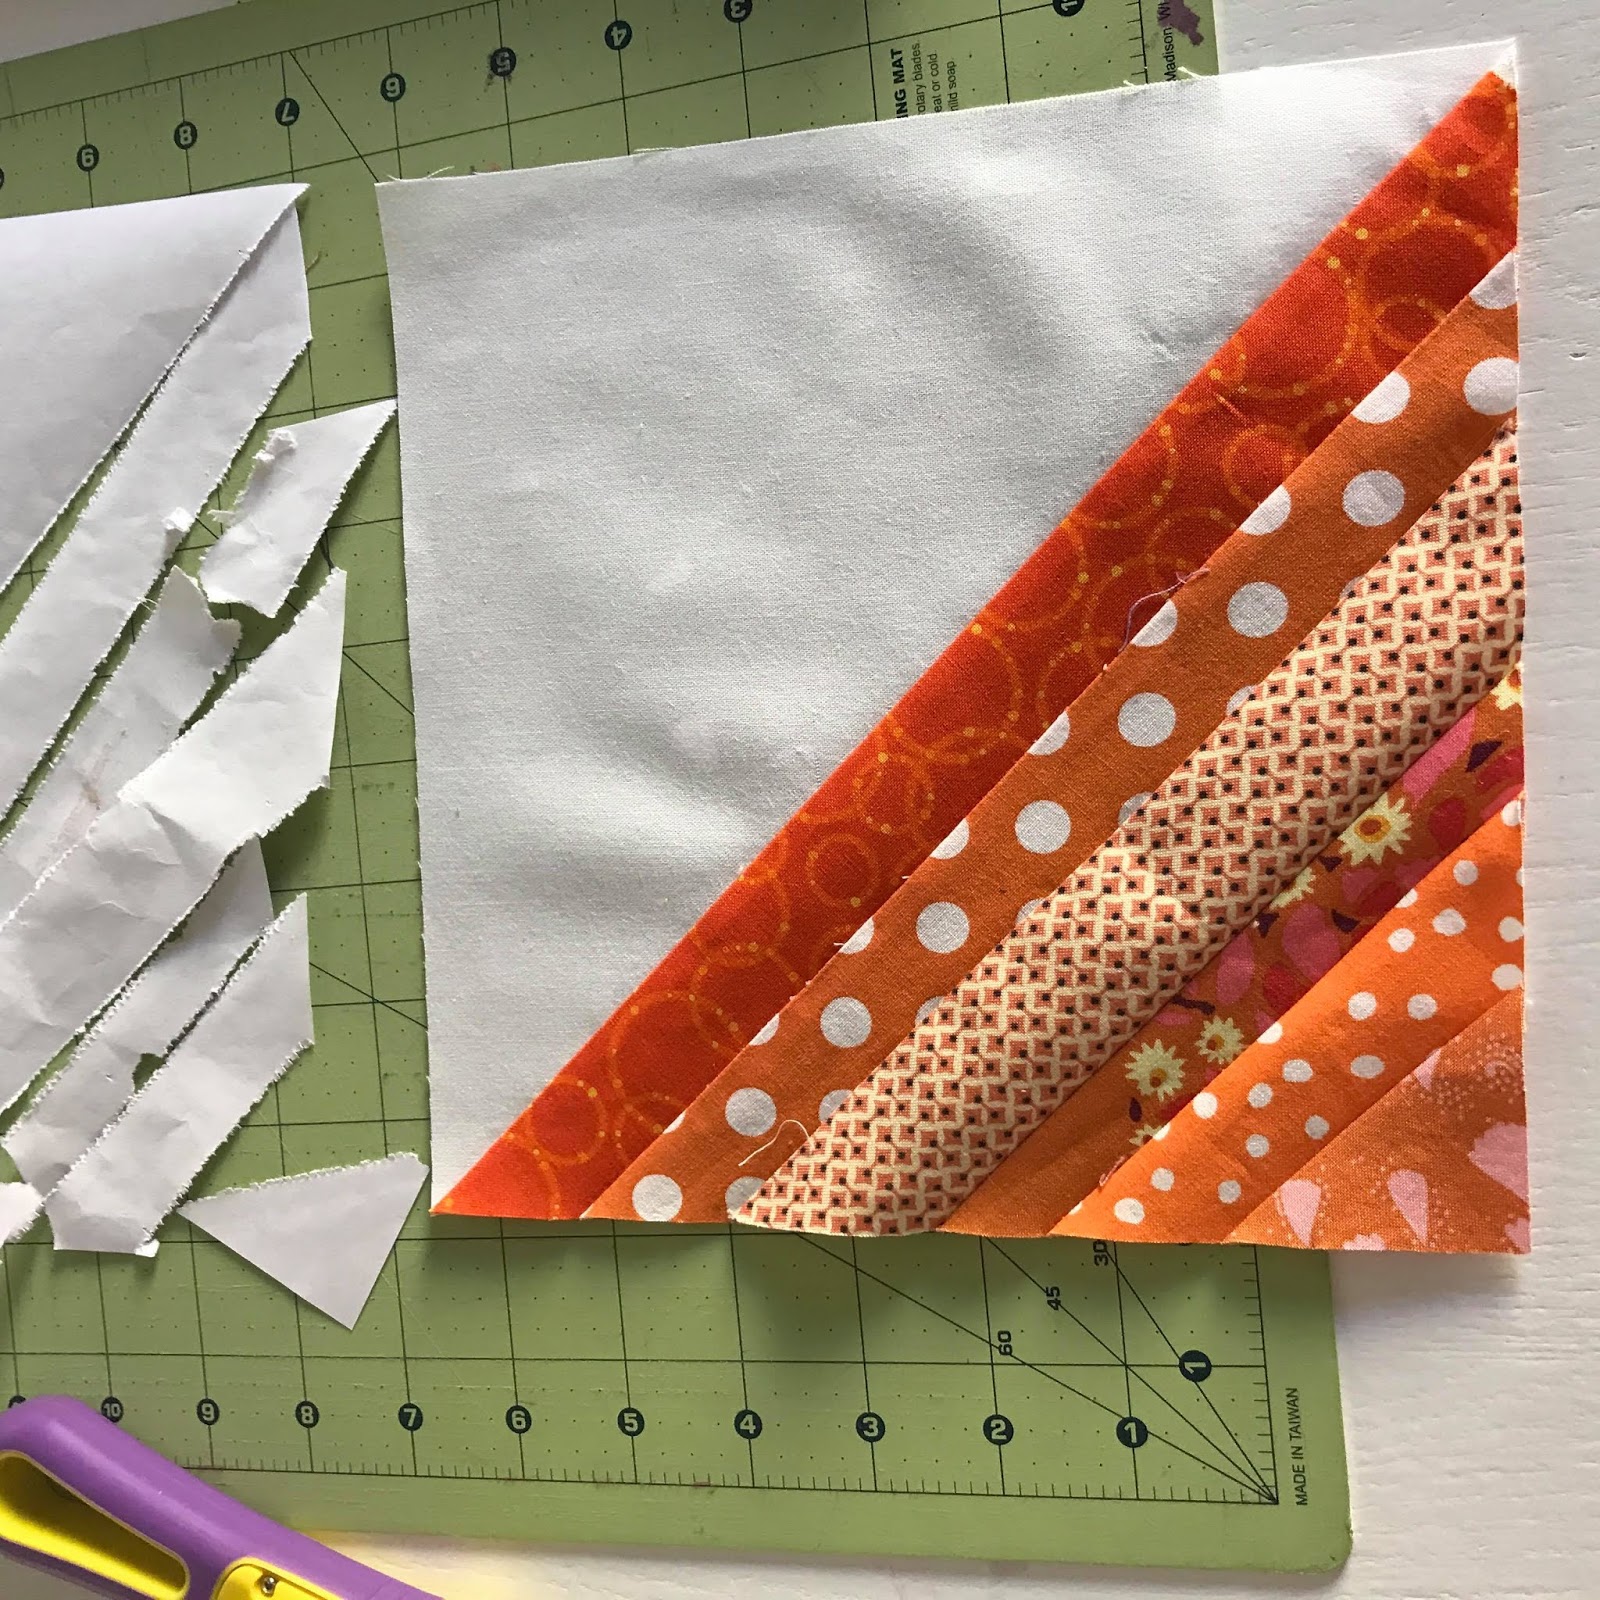
We are asking for simple wonky cross blocks. There are several ways to do this, and many tutorials, so how you go about making them is up to you. Here are a couple that I found quickly: Sew Mama Sew/Elizabeth Hartman, and Lolly Quiltz (which makes 2 at a time, but doesn't use up your scraps!)  This tutorial by Hillary at EntropyAlwaysWins isn't for wonky crosses, but inset strips, which you can use to make a wonky cross - just start with your background either 7" or 13" square, and go from there to inset your cross strips.

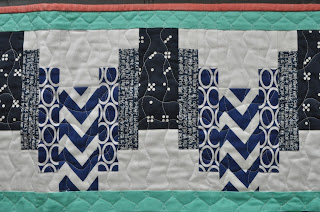
Here's the first one I made. :o)
We ask that you use navy, orange, and white-based low-volume fabrics. We would like most of them to be low-volume background with either navy or orange crosses, but if you are using Carla's technique to make 2 at a time, that's fine, we'll make do. :o)

For size, we would like them to either be 6 1/2" square of 12 1/2" square, or even 6 1/2" x 12 1/2", as we want it to have some good variety and interest.

And we are asking to have blocks by the end of April so we can make the quilts and get them sent down early this summer.

And if you want to send a finished quilt (of any design), we are hoping to send some larger ones, like 72"x80", if that's not asking too much! But if you've got a finished quilt to send, we aren't picky about the size. Just send it! :o)

THANK YOU!!!

Thank you for still reading, thank you for your interest in helping out some people most of us have never met, thank you for your generosity!  We really appreciate you!  And if you can only make 1 block, that's great. If you can make 10, that's great! If you can make an entire quilt, that's great, too. We really want to be a blessing to those who are literally picking pieces of their lives out of the rubble. 

Sunday, February 17, 2019

Scrappy String Half-Square Triangle Tutorial (Foundation Paper-Pieced)


(I hate recipe posts where they tell me a whole bunch of crap before the recipe! Just give them the dadgum recipe, Lisa!)

My tutorial makes two 8 1/2" scrappy string half-square triangles.


You can make it any way you choose so that it looks like I want it to, but I thought this was a pretty fail-safe way to go about it, considering there will be a bunch of different people making blocks for my quilt. Continuity and simplicity are the keys to success here. :o)

Materials
8 1/2" piece of copy paper (x2)
10" x 10" piece of Kona (or similar) solid white fabric, cut to half-square triangles along the diagonal
Scraps of chosen colors of varying lengths and widths. (between 1" - 2 1/2" wide, varied please)

Procedure
  1. Cut paper to 8 1/2" square, fold along the diagonal, and open back up again. 

  2. Draw a line 1/4" from the edge of the fold line on both pieces of paper. This will be the guide-line for the white fabric and your first scrap strip (string). Set one paper square aside for the second block.
  3. Cut the 10" piece of solid white along the diagonal, making two half-square triangles. Set one aside. 

  4. Place the diagonal of the white fabric along the drawn line on the paper, then place a strip of colored fabric (14" long by chosen width), right sides together.  Pin or glue baste, and stitch 1/4" from the line/white/colored fabric edge.
         please make sure that your stitch line goes exactly through the diagonal, like bisecting the 90 degree angle at the upper left and lower right...if that makes sense! I didn't do this right on my second block and you'll see a picture of it below.


    See what I mean? I didn't make sure the first seam of the white-to-aqua strip went all the way from corner to corner. No big deal, I'll still use the block, but I just wanted to warn you to not make the same mistake I did! :o)  Also, another great reason to not trim it...I'm happy to do that. :o)
  5. Open the strip out and press. 

  6. Place second strip (12" by chosen width) along the raw edge of the colored strip, right sides together. Pin or glue baste, then stitch 1/4" seam along the raw edge. Open out and press. 

    Note: I experienced some shifting unless I put a small amount of glue stick glue on the paper where the newly sewn strip goes. I didn't heat-set it, just pressed it down, but it definitely helps keep that piece in place when you stitch down the next piece. And since it wasn't heat-set, the paper pulls off relatively easily. :o)


  7.  Continue to add strips in the same manner until you get to the end of the paper square.

  8. Look! Isn't it cool? :o)  (Optional) Flip it over, take your ruler and trim around the edges of the paper, so that the block is 8 1/2" x 8 1/2" square. *Please make sure that your first diagonal seam goes from corner to corner before you trim. Don't do what I did! ;o)  If you feel like leaving it untrimmed, please do. I am happy to square it up. :o)

  9. Flip it over and look at your hard work!

  10. (optional) Flip it back over and remove the papers. (or leave them, it's okay!)

  11. Please make a second one!
    you can see even better how my aqua fabric didn't actually bisect the square as I had hoped it would. :o)  But it's okay...if yours does that, too, don't stress about it, I'll still use it! :o)
Color Palette

Please use one color per block, using one of the following colors: orange, pink, light-to-medium green, light-to-medium aqua.

Here is my inspiration quilt:
(quilt by blooming poppies)

There you go! Do you have any questions? Please send me an email. :o)

Please note: I would prefer that you not complete this block using fabric foundation piecing because I don't want the added bulk behind the colored strips. Using paper allows you to complete the block to the square specifications, but I can tear it off and there is no bulk. Thank you.

Saturday, November 28, 2015

Top Ten DIY Gifts

I wanted to curate a collection of easy DIY gifts to make for others (or yourself!) this year, and have found THOUSANDS, but these are my TOP TEN! (okay, top twelve, but I couldn't stop!)
But in the spirit of full disclosure, I haven't tried very many of these, they just look really great! Hopefully you won't be posting a #pinterestfail after trying one of these! :)

I found all of these on Pinterest, and give credit and links where they are due.

Enjoy! :)

1. Monogrammed Canvas Tote
I think this is incredibly classy, and (hopefully) easy to do! Teachers, nurses, bus drivers, babysitters, friends...I'm sure they would all love to have one of these!


2. Boot Socks
I know I'm a little tardy to the party, but I really think boot socks are cute! But at $20 (or more) for a pair, I'm more than happy to chop up a thrifted sweater and call it good!  (and use the body of the sweater to make a pillow! Double bonus!)  Who do you know that wears boots? Or has pillows?  Hustle to a thrift store and get cracking! :)


3. Burlap Monogram Tote
I made these a couple of years ago for the preschool teachers, and they continue to comment on how much they love them! It was a really easy project.


4. Lemon Bath Bombs
My mouth is watering at the mere thought of these! I haven't made them, but I imagine the fragrance to be light and invigorating and sunny. Make some for your favorite bath-loving friend, and make her day!  (obviously these are not for eating...)


5. Cinnamon Coffee Scrub

Who can use a little pick me up in the shower? Coffee and scrubbing away the callouses sounds like a great way to wake up! :) And the amount of cute jars available is astounding. There's really no reason you couldn't make this -- we all know SOMEONE who loves coffee, right?


6. Detox Bath
It's that time of year where we are exposed to a ton of germs, and are busy and stressed and aren't getting enough rest or water, so those germs can grab hold and knock us down! Well, this detox bath might be just the thing for a busy friend. We all love to feel pampered AND getting healthy at the same time!:)


7. Jasmine Bath Salts
Here's a true story: When I was pregnant with both of my daughters, I had to have non-stress tests in the hospital 2x a week for 7 weeks prior to their birth. Well, the courtyard outside the hospital was just flourishing with jasmine plants, and since this was April and May, they were flowering like CRAZY! I was always nervous going into those very stressful non-stress tests, and felt calmed by the fragrance of the Jasmine.  I've always loved the smell of Jasmine, but it now holds a special place in my heart. These bath salts will be a blessing for anyone you give them to. :)


8. Emergency Nail Repair Kit
I'm totally making these up for all the teachers to keep in the classroom. And I will, of course, be adding a set of JAMS to the kit! :) Gotta keep those teachers feeling pampered and loved and pretty, right? :)  Also, instead of a full bottle of polish remover, I'm just getting a box of polish remover wipes and putting them in the kit. No one likes a renegade bottle of polish remover! :)


9. Peppermint Foot Soak
I can only imagine how good this would feel after a long day of shopping. Or running errands. Or wearing the heels we tend to wear to any fancy Christmas dinners... I think a peppermint foot soak will be just the right mix of relaxing and invigorating. Perfect for anyone with feet. :)


10. Puzzle Collage
Doesn't this look fun?  When you're at the thrift store getting a sweater, grab a puzzle, and have your kids sort out the pieces by color. I know craft stores like Michaels are constantly putting canvases on sale, and then put the kiddos to work helping you! I think this would be a great addition to any room - for a young person or old!


11. Sugar Soap Scrub
I made this a few years ago for myself and keep it on the shelf in the shower. I love it. Seriously. I even changed the kind of soap we use in the kitchen because I love this fragrance so much! :)  It's an easy, and simple, and much-appreciated gift for anyone you know.


12. Tile Photo Coasters
Everyone loves to show off pictures of their kids and grandkids, right? But sometimes there's no wall space left! So a coaster is a great alternative. And these are really easy to make. Find your favorite pictures, and some simple tiles, and go for it! Have fun with it! Let the kiddos help! :)


So, there you have it! Some great ideas for gifts to make this year! I hope your holidays are wonderful and filled with blessings. 

Wednesday, August 26, 2015

TRANSPARENCY!! (Bee Sewcial Instructions for March 2015)

Hi!  This post is for the members of the Bee Sewcial bee, and those following along as part of the Inspired by Bee Sewcial team. Hi! :o)

March is my month to inspire and challenge my fellow Sewcialites to make blocks for my quilt. I'll be honest, my creativity is waning, and even though I've been ruminating on this quilt for a few weeks, I don't feel like I'm coming up with anything really challenging and innovative and unique. But as I have thought about it, I keep coming back to two features that I would love to have, and this is where I'm starting:

1. Cool blues and cool greens.
2. Transparency

Here are some color palettes for you to start with:
March ~ Melissa
And I would like any neutral to be a light/pale gray or light blue/gray, as you can see in some of the palettes.
As for transparency, I couldn't find a lot of images on Flickr, but I do love the original Traveling Quilt by Oliver+S, which can be found HERE

really love this watercolor quilt by Eliza Kenan HERE


and this doll quilt on Flickr by Lisa K.
Completed doll quilt: Strawberry-Rhubarb Πr2 by losabia

Cool, right?

So, here are my instructions. 
1. Please make 2 blocks -- one at least 14" unfinished square (trim or don't trim, I just need it to be at least 14" to start, ), and one at least 9" unfinished.
2. Using mostly blues and mostly greens, and a slight dash of light gray, please construct the blocks however you like, in order to create a sense of transparency. Strips, squares, circles...whatever! I just love how the colors blend. Think Venn Diagram. ;)

(UPDATE!)

Here are the finished blocks on my design wall. There is no rhyme or reason for them to be where they are, and I have NO clue how to lay them out, but here they are! :)


And there you have it, folks! March for the Bee Sewcial bee! Transparency. :)

Tuesday, May 12, 2015

One Step At A Time: Stop One on C&T's Blog Hop ~ and GIVEAWAY!

Helloow!  And welcome to the first stop on C&T's "The Modern Medallion Workbook Blog Tour!"


C&T has just released The Modern Medallion Workbook, and I am so so so very happy to have my One Step at a Time quilt be a part of it!


When I first found out about this book, medallion quilts were just coming back into vogue, but I admit that I had NO clue what a medallion quilt was! So, if you're like me, wondering what makes a design a medallion, and if it is even possible to make it look modern, here you go! :)  Here's my definition: a medallion quilt is one where the center block is a point of interest, maybe a star, maybe a basket of flowers, maybe a swirl of hexagons, and then each border radiating away from the center is different, and unique.


The novel concept behind THIS book is that it truly is a workbook. If you are making your own modern medallion quilt and like the center block from one quilt, and then like the third border another quilt, but don't like the rest of the borders, just pull it out and incorporate it into your quilt! Easy peasy! You are literally able to resize and redesign any quilt you want by taking bits and pieces from all the quilts and making it your own! I love that idea! :)

Or what if you love a design, but don't love the colors the designer used? Well, you are in luck! There are coloring pages at the back of the book (and my oldest daughter is very interested in these!) :)


And as an added bonus, there are loads of techniques highlighted in here. Pieced curves, applique, paper-piecing...not only can you make beautiful quilts, but you'll become a more talented quilter along the way! Jackpot!

It's a great book. It really is. Again, I feel so humbled to be included in a publications with the likes of Latifah Saafir, Becca Bryan, Erica Jackman, and Janice Ryan (our fearless leader), to name just a few!  And not only that, but the quilts they designed are really, truly, STUNNING. Stunning. Those ladies have got some real talent! :)

So for me, when it came time to design the quilt, I started with a sketch using grays and yellows, but that was too dreary. And I didn't want to be a TOTAL broken record and design ANOTHER rainbow quilt, so I went with a color scheme I think is truly fresh and modern and delightful -- cool greens and blues with a pop of coral. One of my favorite outfits from 8th grade was a navy blue skirt and a kelly green sweater with blue trim. I loved this color combination then, and I love it now!
                          
For my medallion, I went with a swirl of hexagons. I do love me some hexagons! I used an invisible thread and my blind hem stitch to applique them to the background fabric.


And then, each border is a different method of creating a chevron. There are four unique chevron borders on this quilt, and I think each one would make a lovely quilt!

(In fact, the border that started this whole thing is the Palace Steps border, which I designed for this quilt that the Faith Circle of the do.good stitches bee made for Restore Innocence in 2013)

                                  Palace Steps ~ finished.  


When it came time to quilt it, I wanted to quilt each section/border in a way that was reflective of that border, if I could. And frankly, I kinda made it up as I went along. :)

In the center, I quilted a swirl of feathers...if you could call it that? I just wanted to mirror the hexagons, and I like how it turned out!

                            
Then in the first border, I quilted half-flowers in each large triangle space. Maybe I should call it a fan? I don't really know! :)


And the corner treatment:


In the green quarter-circle border, I quilted what reminds me of a fern frond. There is a "stem" that curves through each "leaf" section, and then blades that are quilted on either side of that stem.


 The third border is quite possibly my favorite because I had a vision, but it was complicated, and then I came up with a method to create the border with a lot less trouble than my original idea! I love it when that happens.  Anyway...I quilted it with gentle waves.                         
And in the final border, I quilted more waves, but in both directions, as the steps went up and down.


And now for the true truth: this was hard for me! Even though I had the design, and had the skills to create the quilt and to write the pattern, this was possibly the hardest thing I have done as a quilter.  The perfectionist monster inside of me came out in an ugly manner more than a few times! I don't like that. Maybe if I were to submit another quilt to another book, I would be a little less wound up about it, I don't know, but this was HARD!! :)

Don't get me wrong, I am very glad I did it, and Janice was a PHENOMENAL asset to the completion of this book, she was on top of everything, encouraging the authors to get their stuff in on time, and patient as a dove with me in all my insecurities. She is the rock and the glue and the life that made this workbook really come together.  (FYI - in case you are wondering why I'm mentioning Janice so much, she and Beth split up the list of contributors so I didn't really hear much from Beth since Janice was my team captain.)

This blog hop continues for another 10 days, so please visit the other contributors and read about how their modern medallions took shape!

May 13thAmy Sinibaldi- nanaCompany.typepad.com

The giveaway is closed. Annmarie from Wisconsin is the winner. :) Thanks for all your lovely comments!
 

Now to the GIVEAWAY!!  I personally HATE Rafflecopter, so i'm not going to go that route.

C&T has offered to give one copy of the book to one lucky recipient here. If you win, and you live in the US, you will receive a hard copy of the book. If you live outside the US, you'll receive an electronic copy of the book.

So...to win, I would like you to leave one comment with what your favorite modern color combination is right now. :)  It's that simple! (Giveaway will close at 11:00pm MDT Friday the 15th of May)</s>

And then, tomorrow, go visit Amy's blog. ;)

Have a great day!